
Create your account and finish onboarding
Register, verify your email and finish the onboarding screens to claim your free credits.
Listen to this lesson · 2:26
In shortSign up at the register page with your email or Google, click the link in the verification email, then finish onboarding: one screen for your business and website, and one to set notifications and claim your free credits. The bonus is granted once per account and once per network, so a second account on the same office connection gets none. You can upgrade later; nothing in onboarding charges you.
What this lesson covers
Before you can open the dashboard you need three things: an account, a verified email address and a finished onboarding. This takes about five minutes. At the end you have one domain set up and a small credit balance to try the tools with.
Onboarding asks for very little, and almost everything can be changed later in Settings. The one choice worth thinking about is the website you enter, because it becomes your first domain and most dashboard pages work on the selected domain.
Before you start
- An email inbox you can open now (or a Google account).
- Your website address, for example
https://example.com. - Your company name and industry. A short business description is optional.
- Optional: a referral code, if someone sent you one.
Step by step
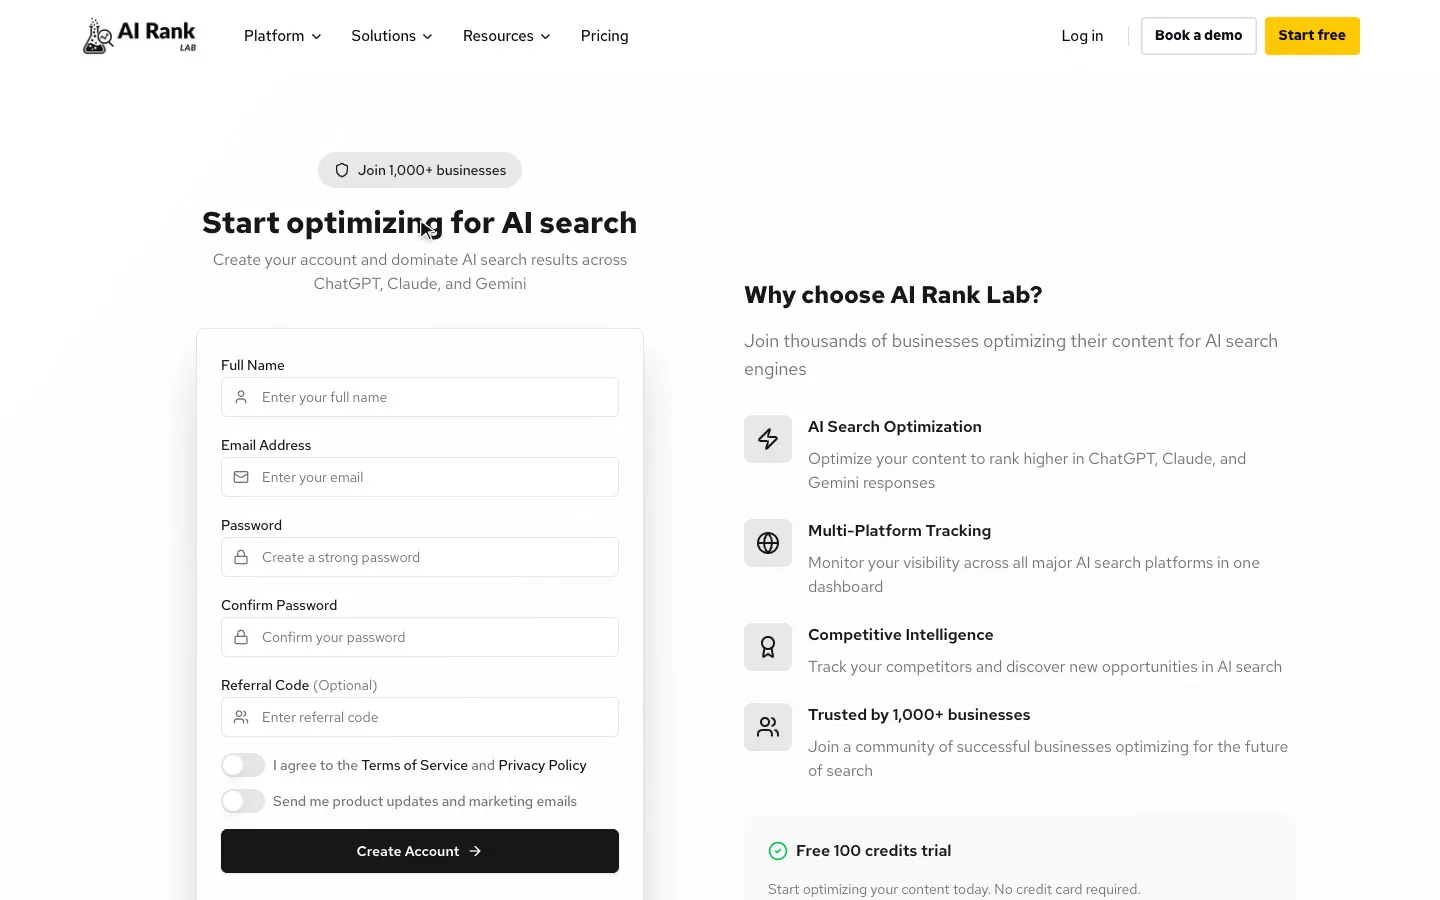
- Create the accountOpen Create a free account. Enter your name, email and a password of at least 6 characters (twice), add a referral code if you have one, and accept the terms. Or click Continue with Google, which skips the verification email because Google has already confirmed the address.
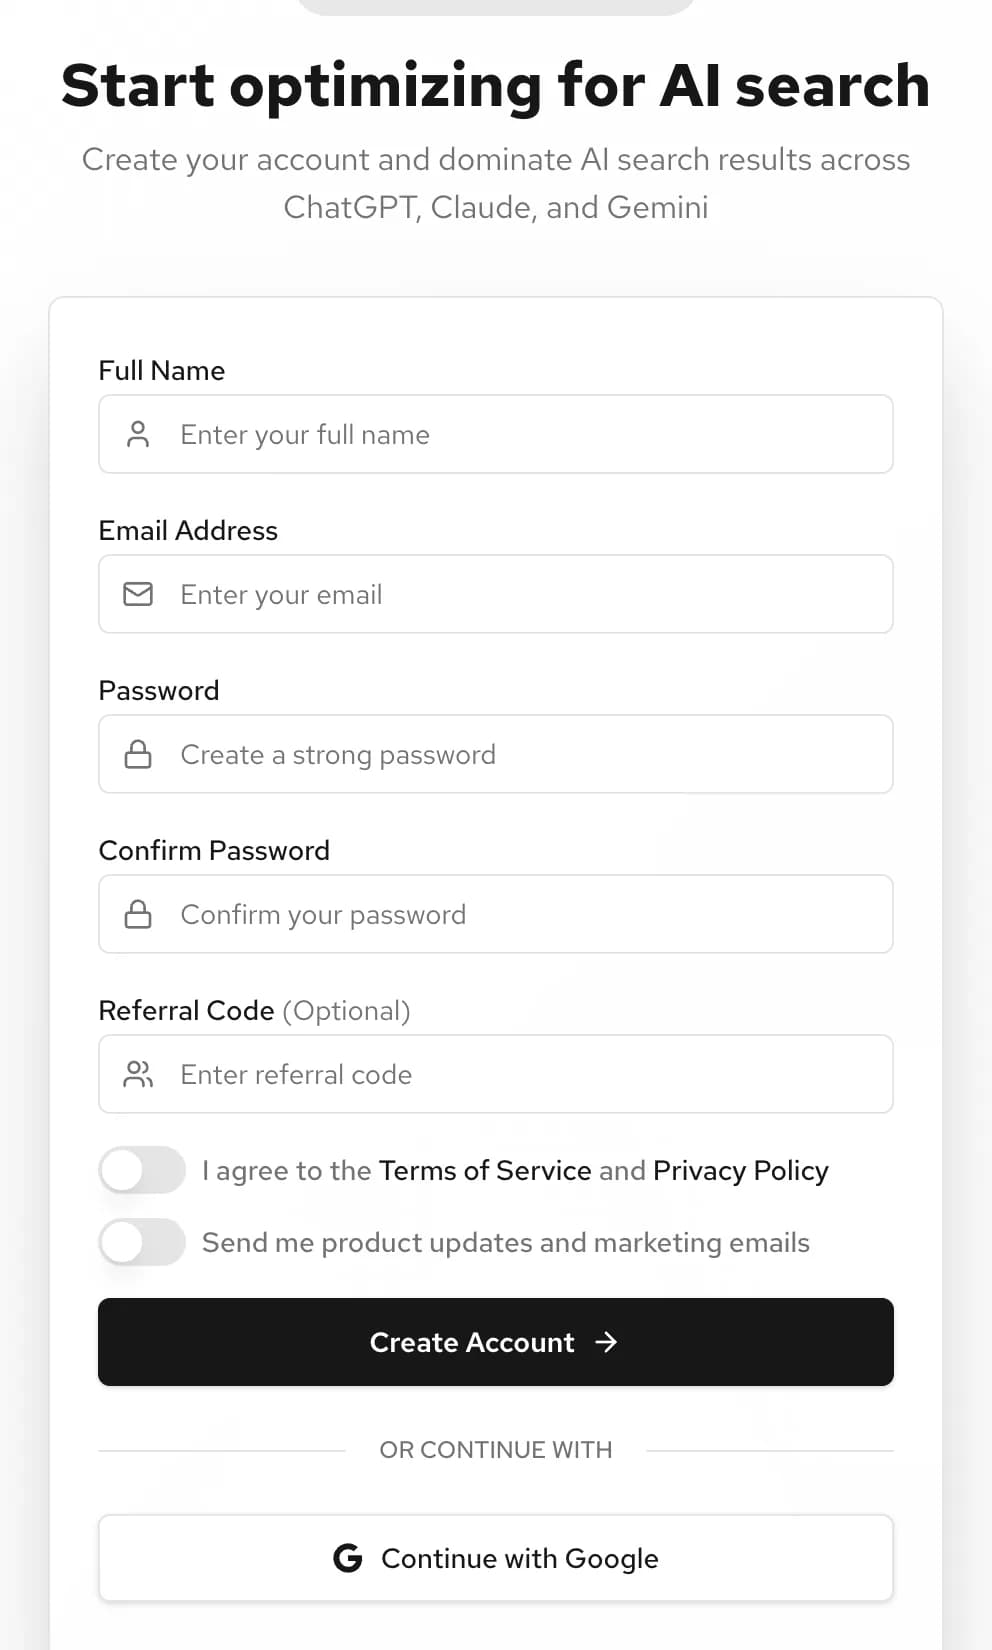
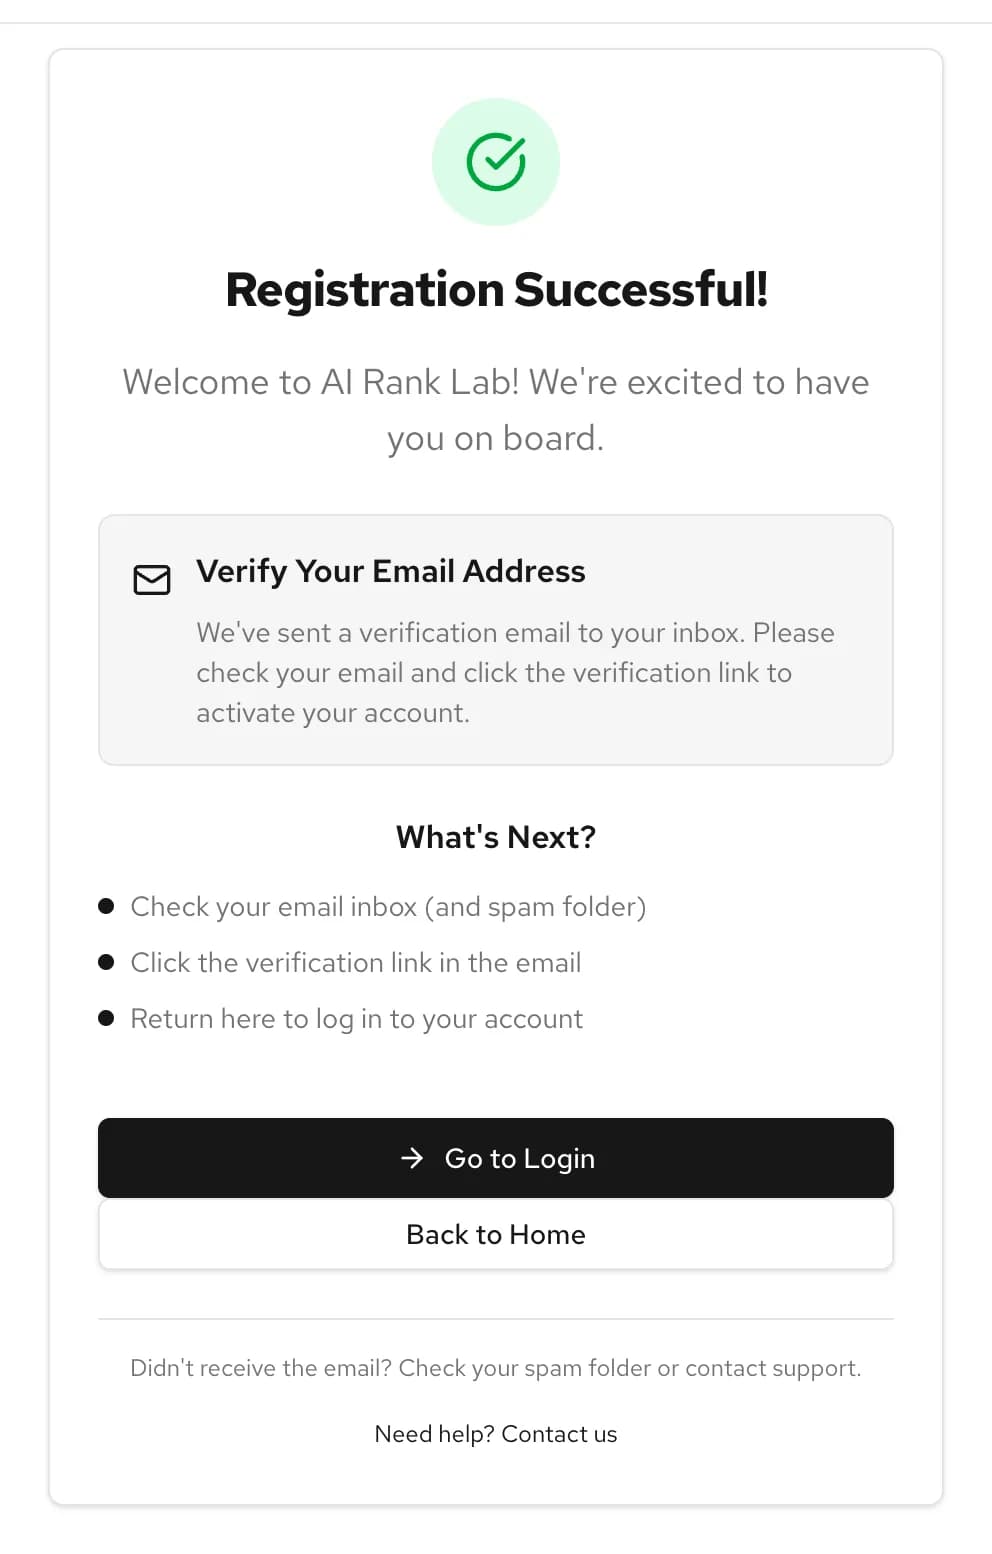
The register page. - Verify your emailYou land on a Registration Successful! page that asks you to Verify Your Email Address. Open the email we sent and click the link. The link works for 24 hours. If it hasn't arrived, check your spam folder. If the link has expired, the page it opens offers Resend Verification Email; if no email came at all, contact support. When it's done, log in with Go to Login.
Check spam first. - Business InformationThe Complete Your Onboarding page shows two circles at the top. The first screen asks for Business Type (Single Business, Enterprise, Agency or Custom), Company Name, Industry and, optionally, Company Size and Business Description (up to 1,000 characters). Below that, under Website Projects, give your site a Project Name and a Domain. Click Save & Continue.
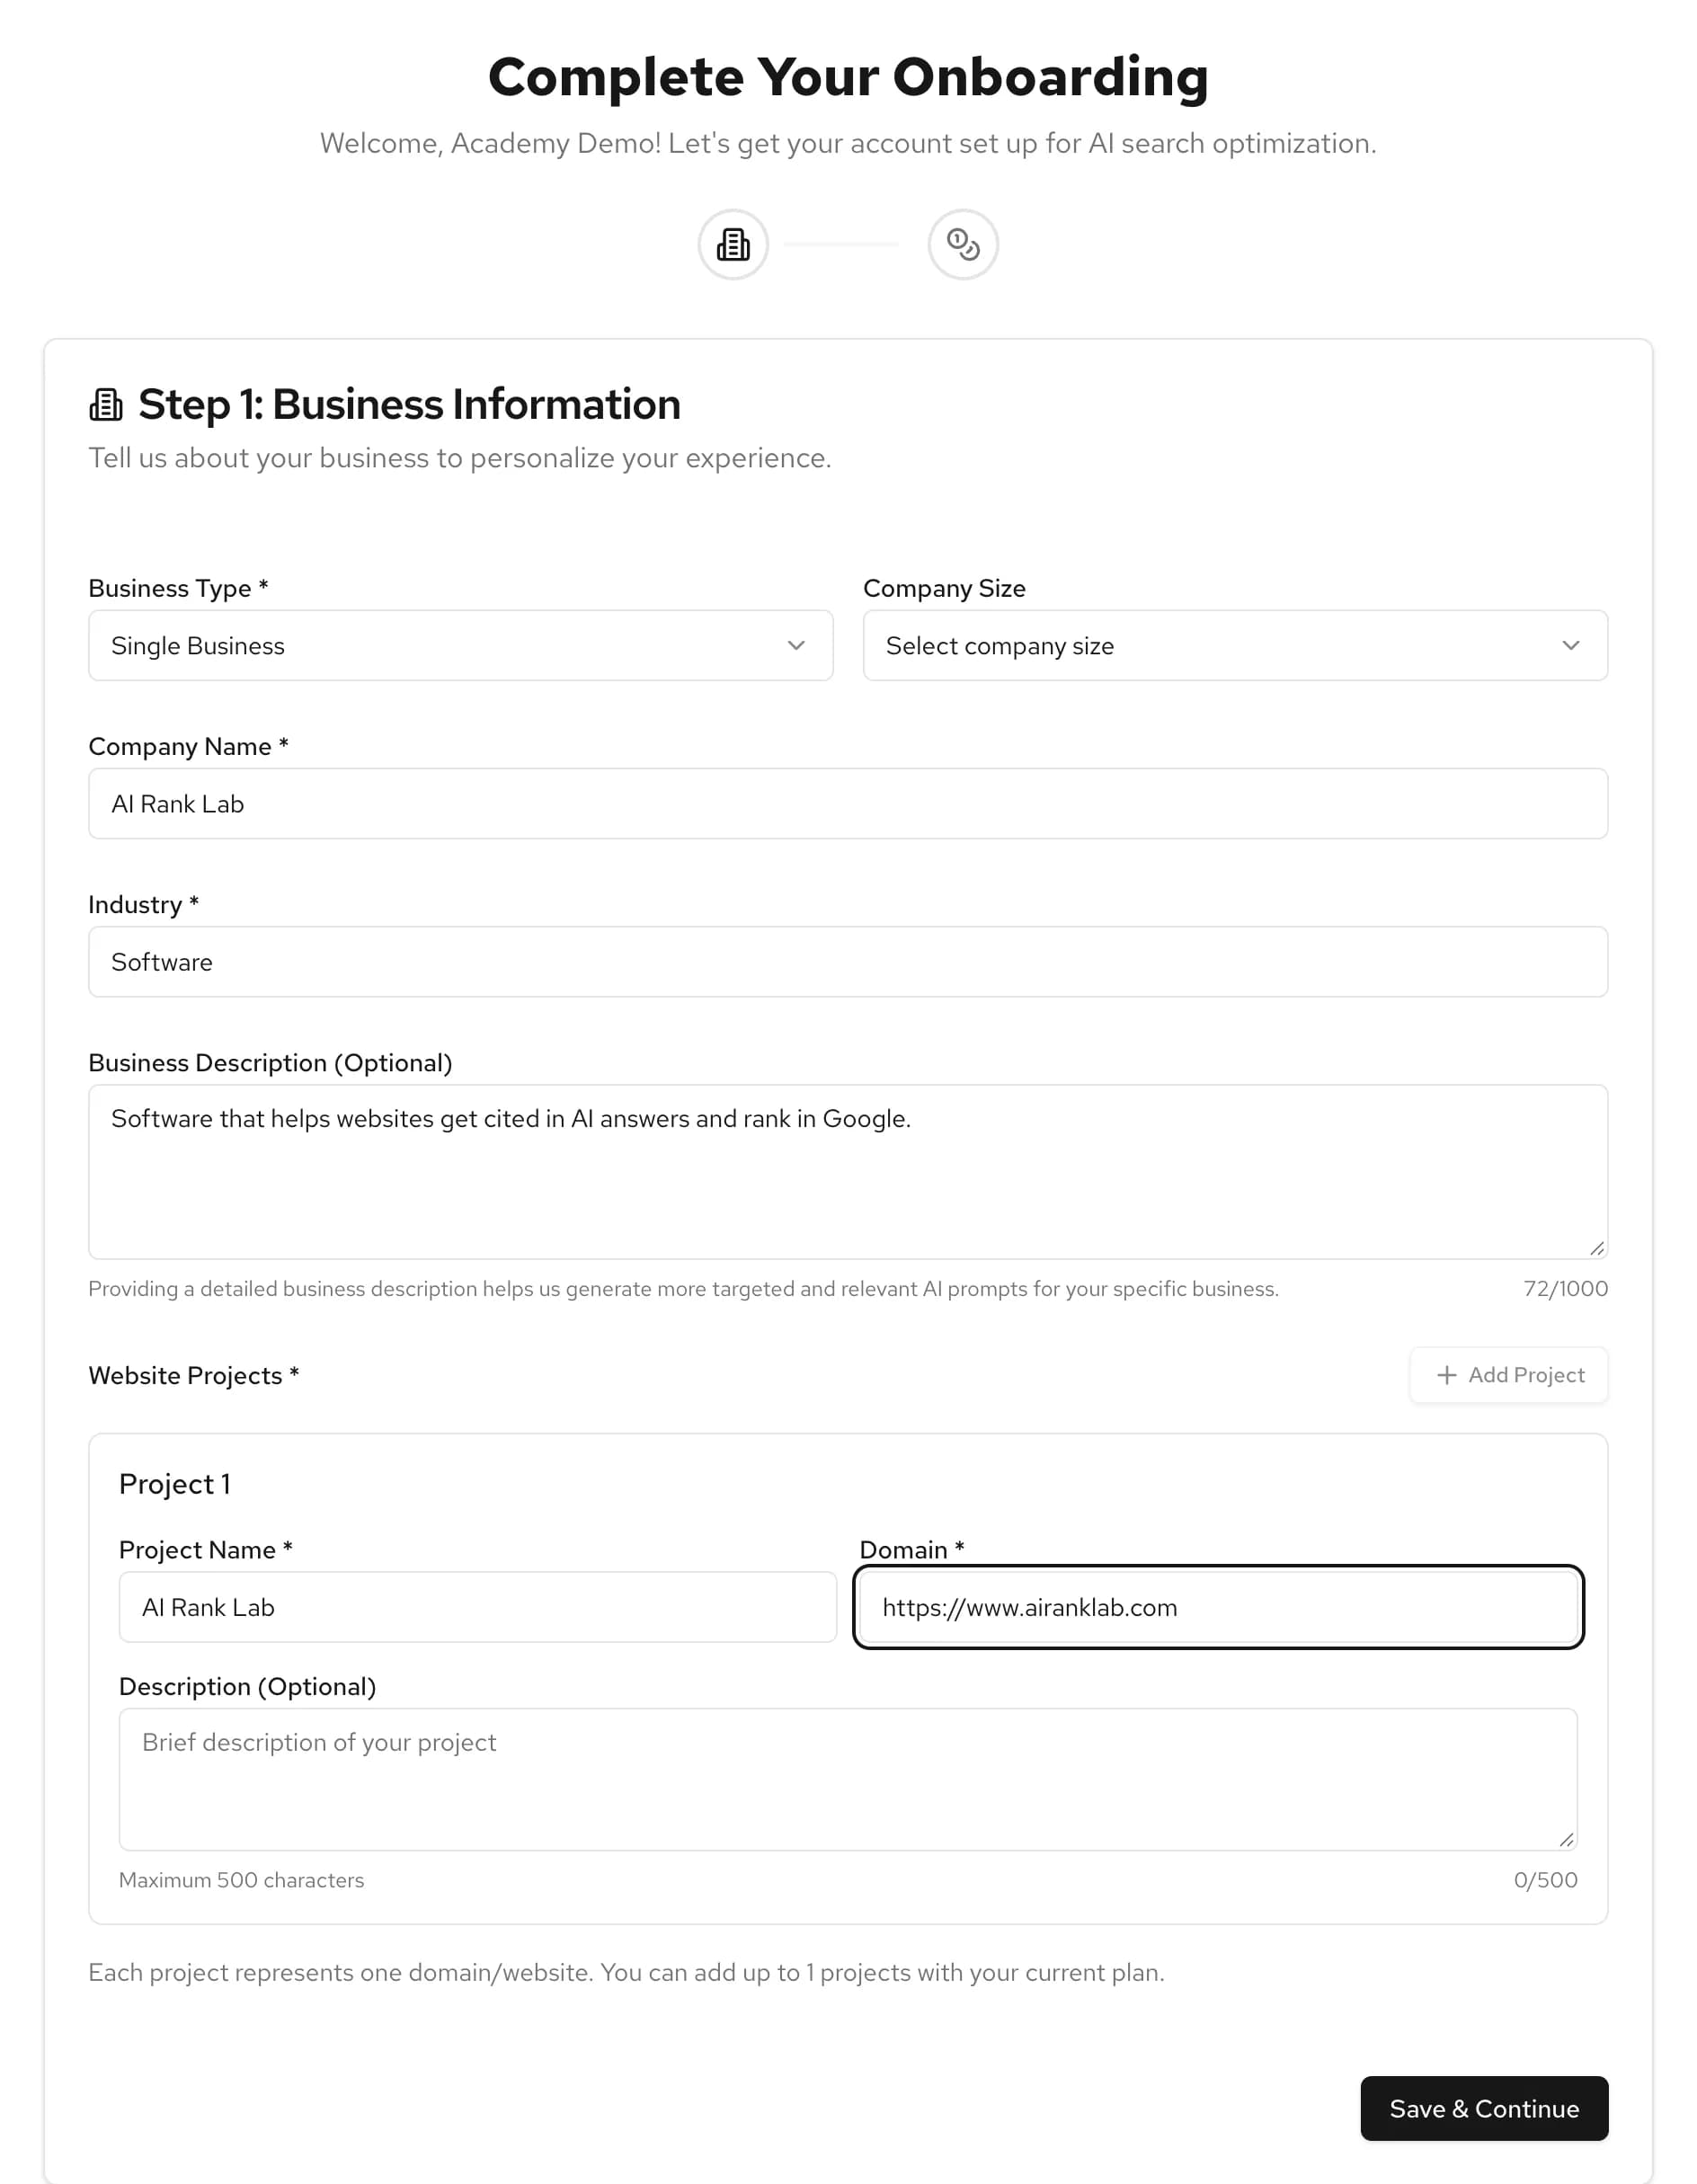
Each project is one domain. - Complete and claim your creditsThe second screen is headed Step 4: Complete. It shows plan cards for information, then Notification Preferences (Email Notifications, Daily Reports, Weekly Reports) and Timezone. Set them, then click Complete Setup & Get 100 Free Credits. A green message confirms the credits and you are taken to the dashboard.
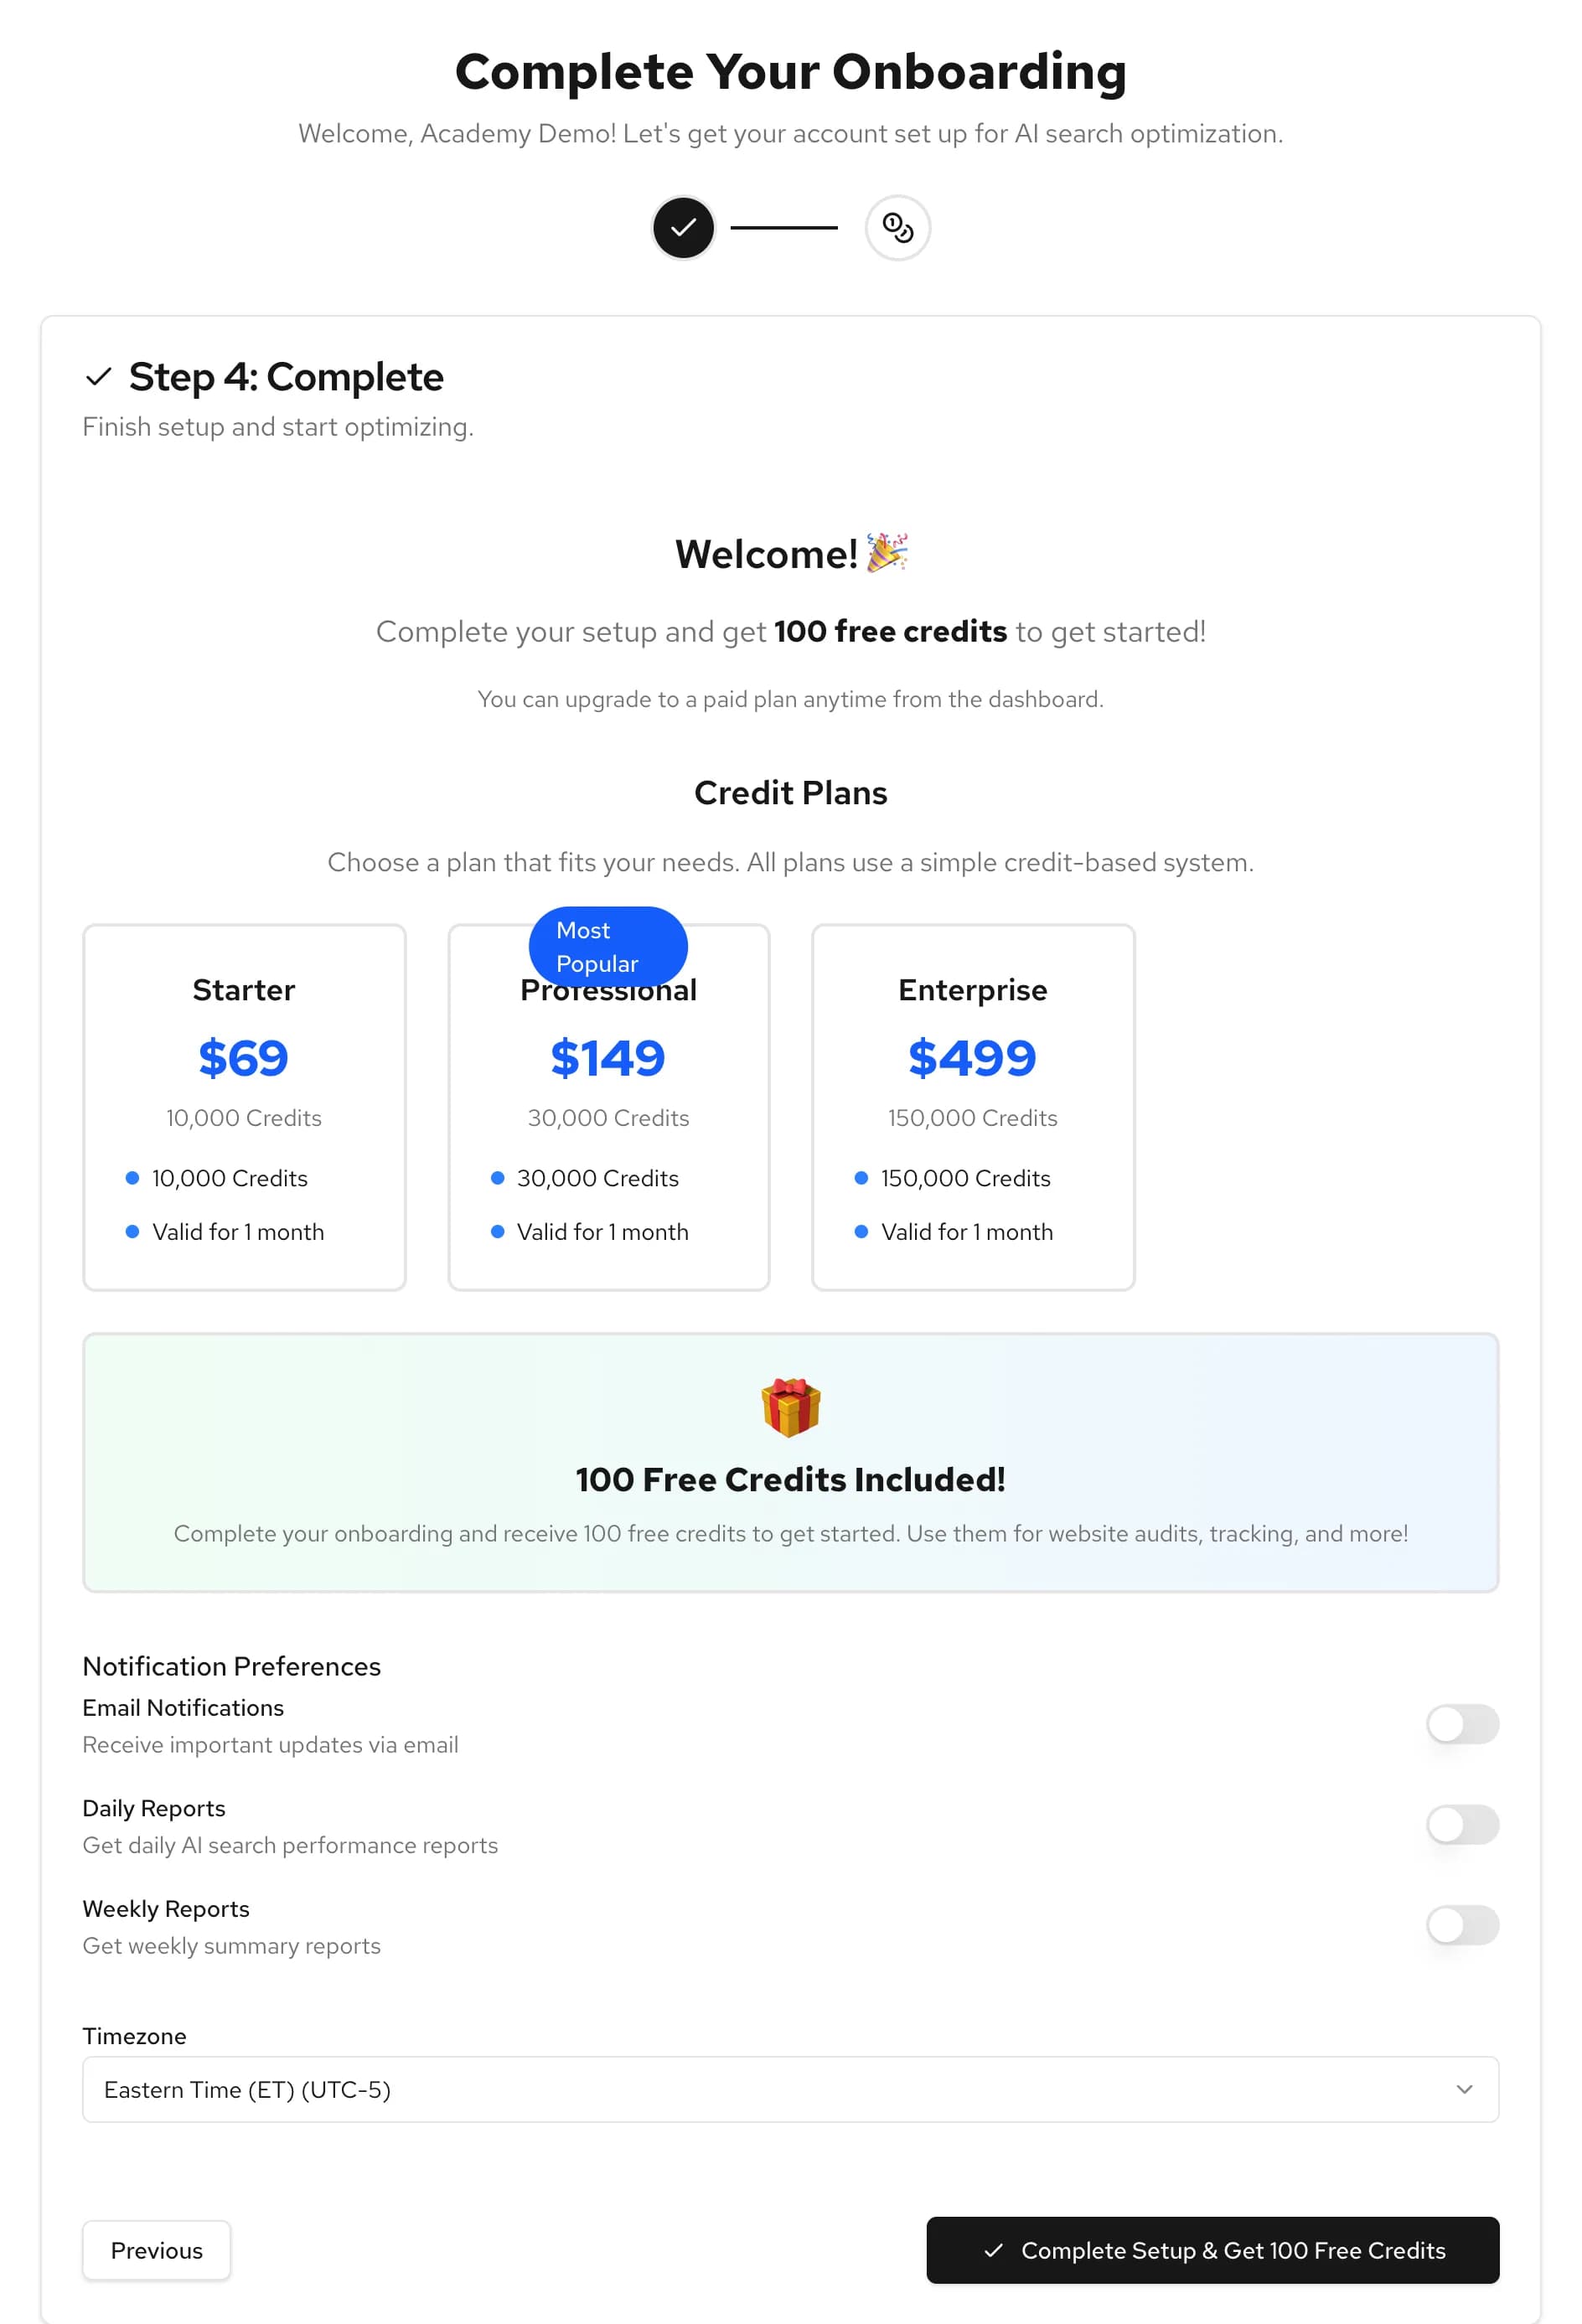
Picking a plan card here does not buy anything.
Every account finishes onboarding on the free start, whichever plan card is highlighted. To buy a plan or a credit pack later, use Settings → Plans or Settings → Coins & Credits. See /pricing for what each plan includes.
The free credits are granted once per account and once per internet connection. If a colleague already claimed them from the same office network, or you are behind a shared mobile connection, your account finishes onboarding with no bonus and the message just says "Onboarding completed!". Contact support from the contact page if that happens to a genuine new account.
To fix a typo on the business screen, click the first circle in the progress bar rather than Previous. Your answers are kept in the browser while you are on the page.
What happens to what you entered
The website you add becomes your first domain. The domain selector at the top of the dashboard starts on it, and AI Rank Lab creates a tracking ID for it so you can install the tracking tag in the next lesson. You can add more domains afterwards in Settings → Domains; adding a domain costs nothing.
You can edit company details, timezone and notification settings later in Settings → Account.
What the free credits are enough for
The bonus is small on purpose. It covers a page audit or one prompt run on a single AI engine, not both, so you can see a real result before you pay. Most tools show their price before they run, and reading results you already have is free.
Check yourself
0 of 3 answered.
Progress is saved in this browser.
Transcript
Put the lesson to work
Paste your site and get a free SEO, AEO and GEO audit with the fixes, then come back to the next lesson.