
Add your domain and install the tracking tag
Add a domain, install the tag on WordPress, Shopify or plain HTML, and pass verification.
Listen to this lesson · 2:53
In shortAdd a domain in Settings → Domains, then open AI search → Monitoring and reports → AI bot tracker. The Tracking Setup panel gives you a one-line script tag and install notes for HTML, WordPress, Shopify, Wix and Squarespace. Paste the tag before the closing body tag, publish, then click Verify Installation. Tracking costs a small amount of credits per 100 tracked requests and pauses when your balance reaches zero.
Why the tag matters
Most of AI Rank Lab works from the outside: it reads your pages and asks AI engines questions. The tracking tag is the one piece that runs on your own site. It records visits that arrive from AI assistants, such as a person clicking a link in a ChatGPT or Perplexity answer, so you can see which pages AI sends people to. The same tag powers session recordings and heatmaps in CRM and email if you switch them on.
- Visitor arrivesA person clicks a link in ChatGPT, Perplexity or Gemini, or a JS-capable agent loads the page.
- Tag runsThe tracking script in your page sends the visit, page and referrer.
- ClassifiedAI Rank Lab labels the source: AI-referred human or AI agent.
- DashboardAI bot tracker shows pages, referrers, countries and daily traffic.
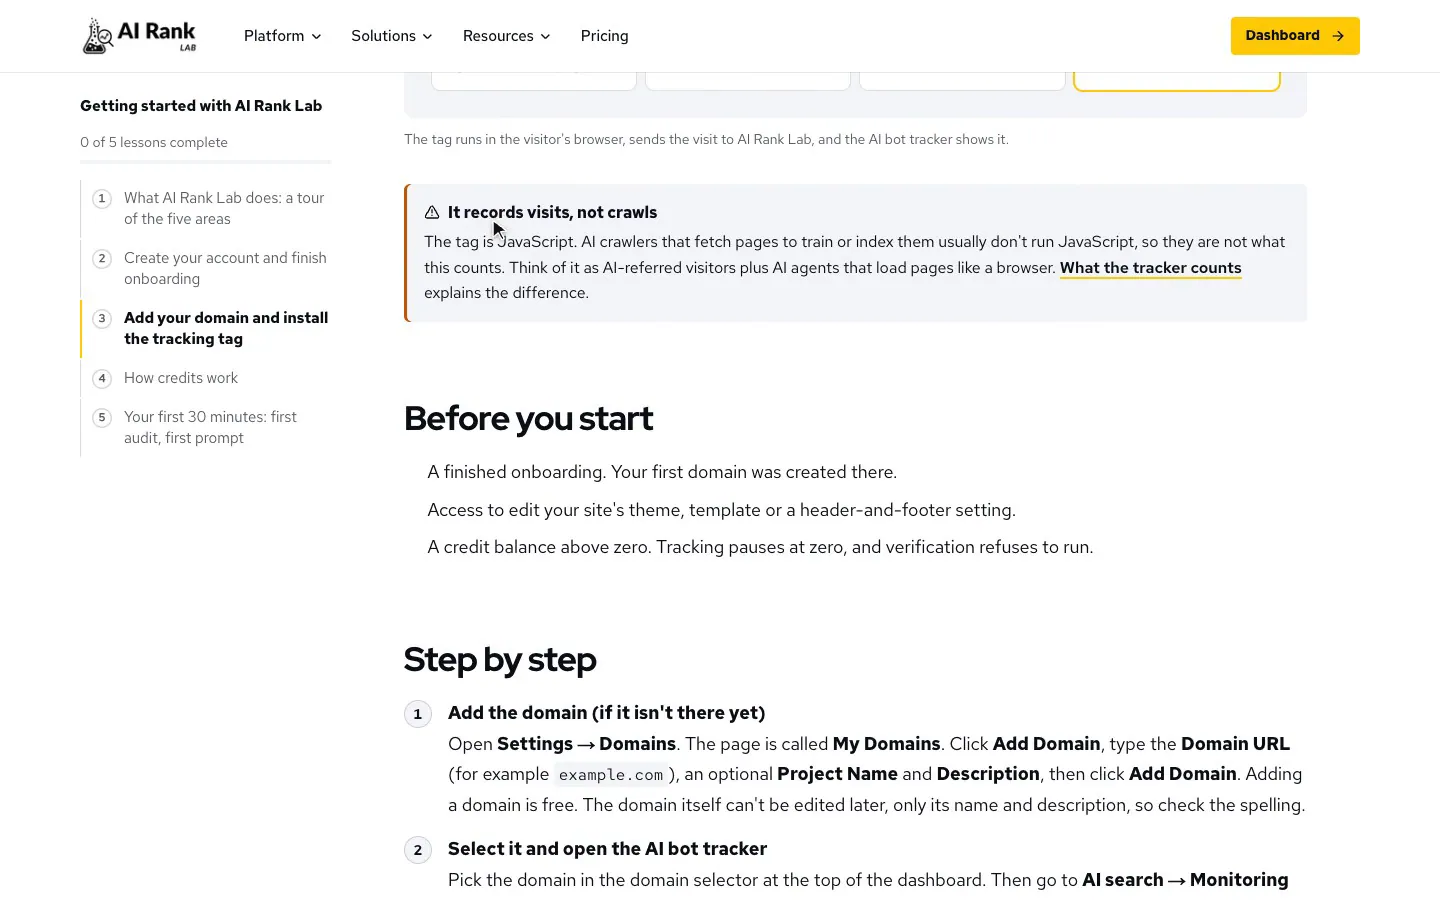
The tag is JavaScript. AI crawlers that fetch pages to train or index them usually don't run JavaScript, so they are not what this counts. Think of it as AI-referred visitors plus AI agents that load pages like a browser. What the tracker counts explains the difference.
Before you start
- A finished onboarding. Your first domain was created there.
- Access to edit your site's theme, template or a header-and-footer setting.
- A credit balance above zero. Tracking pauses at zero, and verification refuses to run.
Step by step
- Add the domain (if it isn't there yet)Open Settings → Domains. The page is called My Domains. Click Add Domain, type the Domain URL (for example
example.com), an optional Project Name and Description, then click Add Domain. Adding a domain is free. The domain itself can't be edited later, only its name and description, so check the spelling.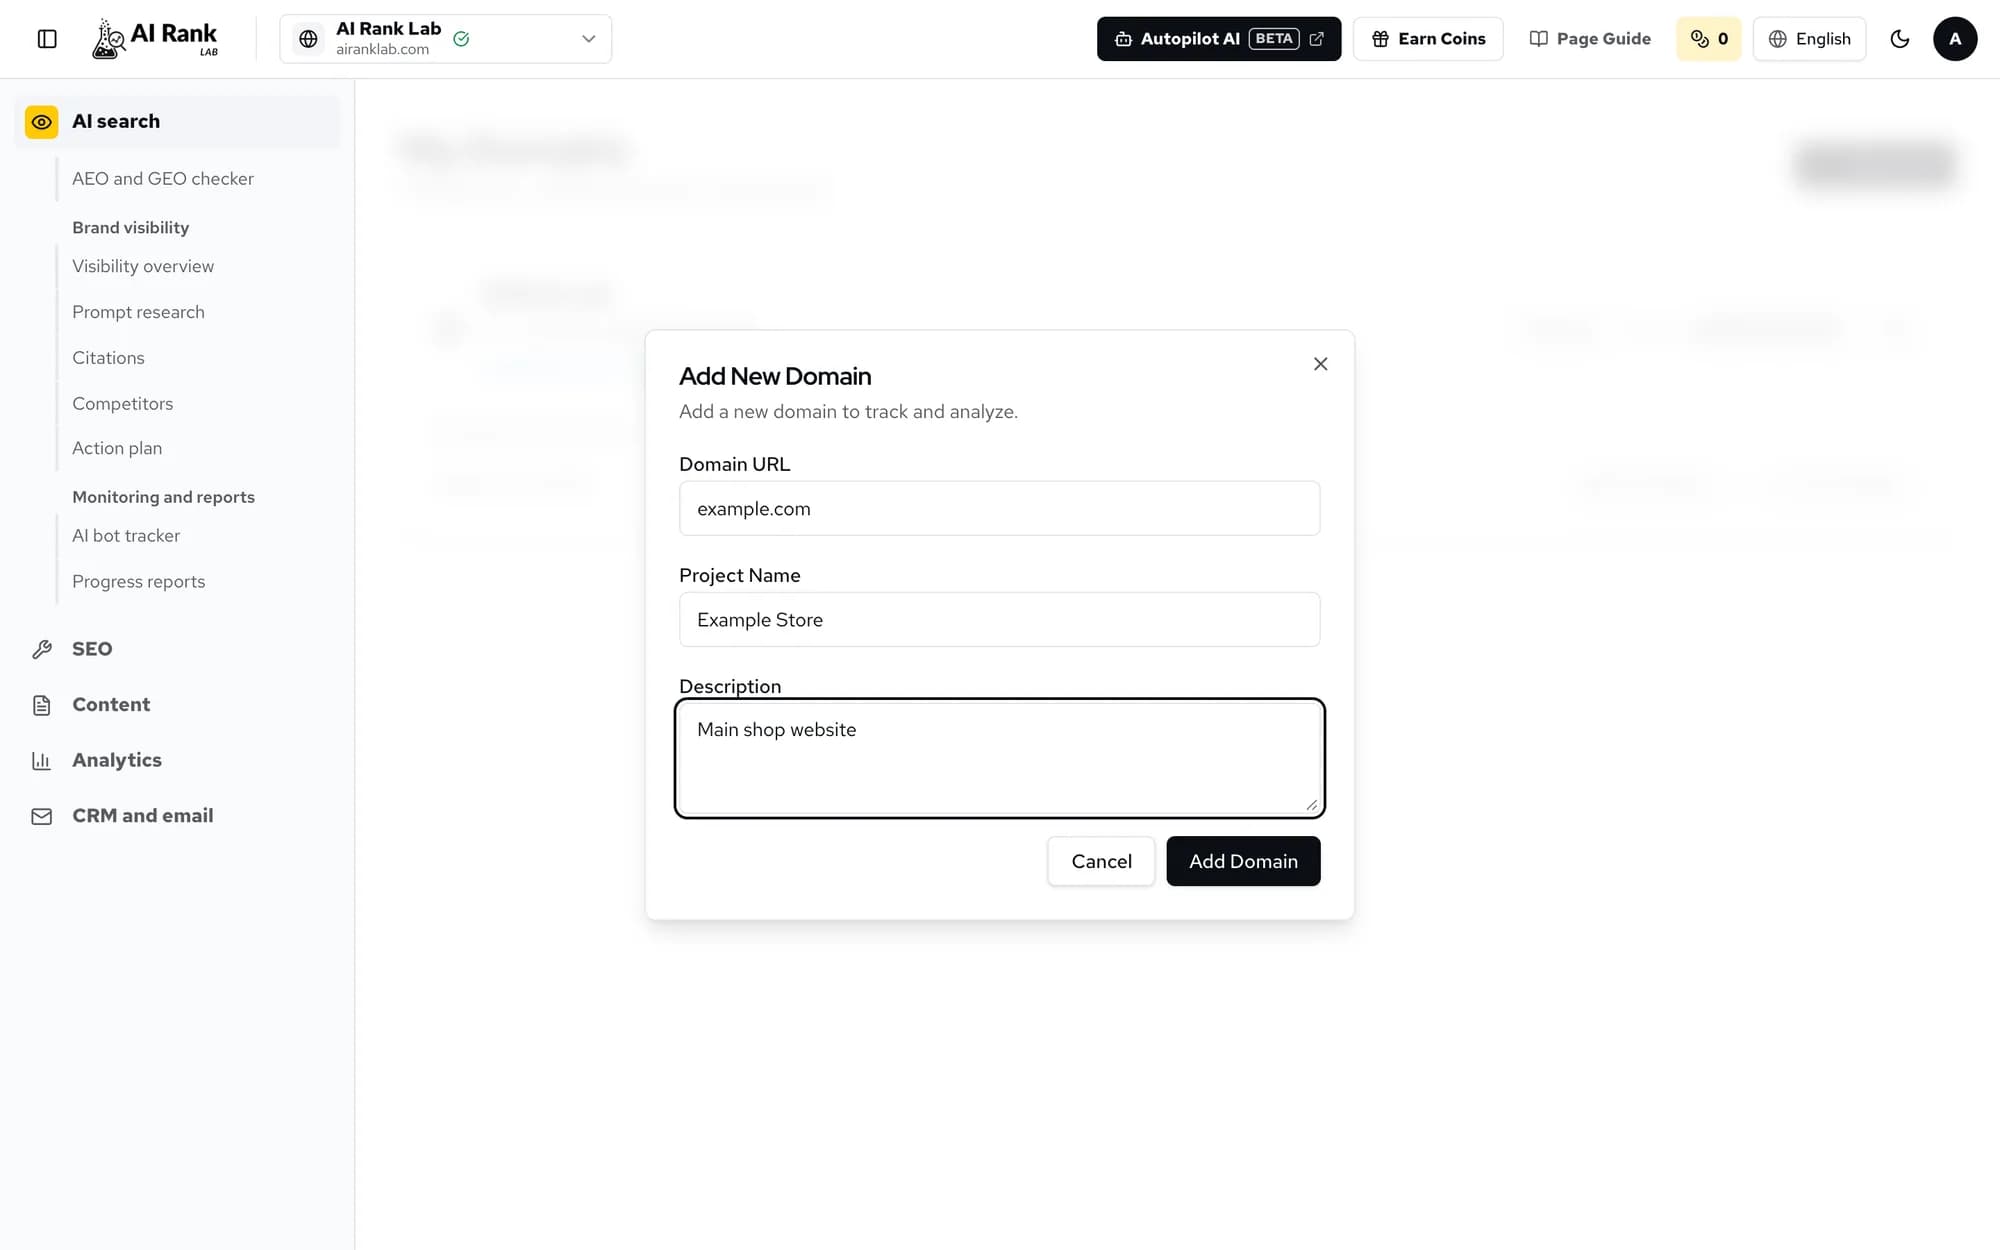
Settings → Domains → Add Domain. - Select it and open the AI bot trackerPick the domain in the domain selector at the top of the dashboard. Then go to AI search → Monitoring and reports → AI bot tracker. For a domain that isn't verified yet, the Tracking Setup panel slides in from the right. The Verify button on a domain's card in Settings → Domains also brings you here, but it opens the tracker for whichever domain is selected, so select the domain first.
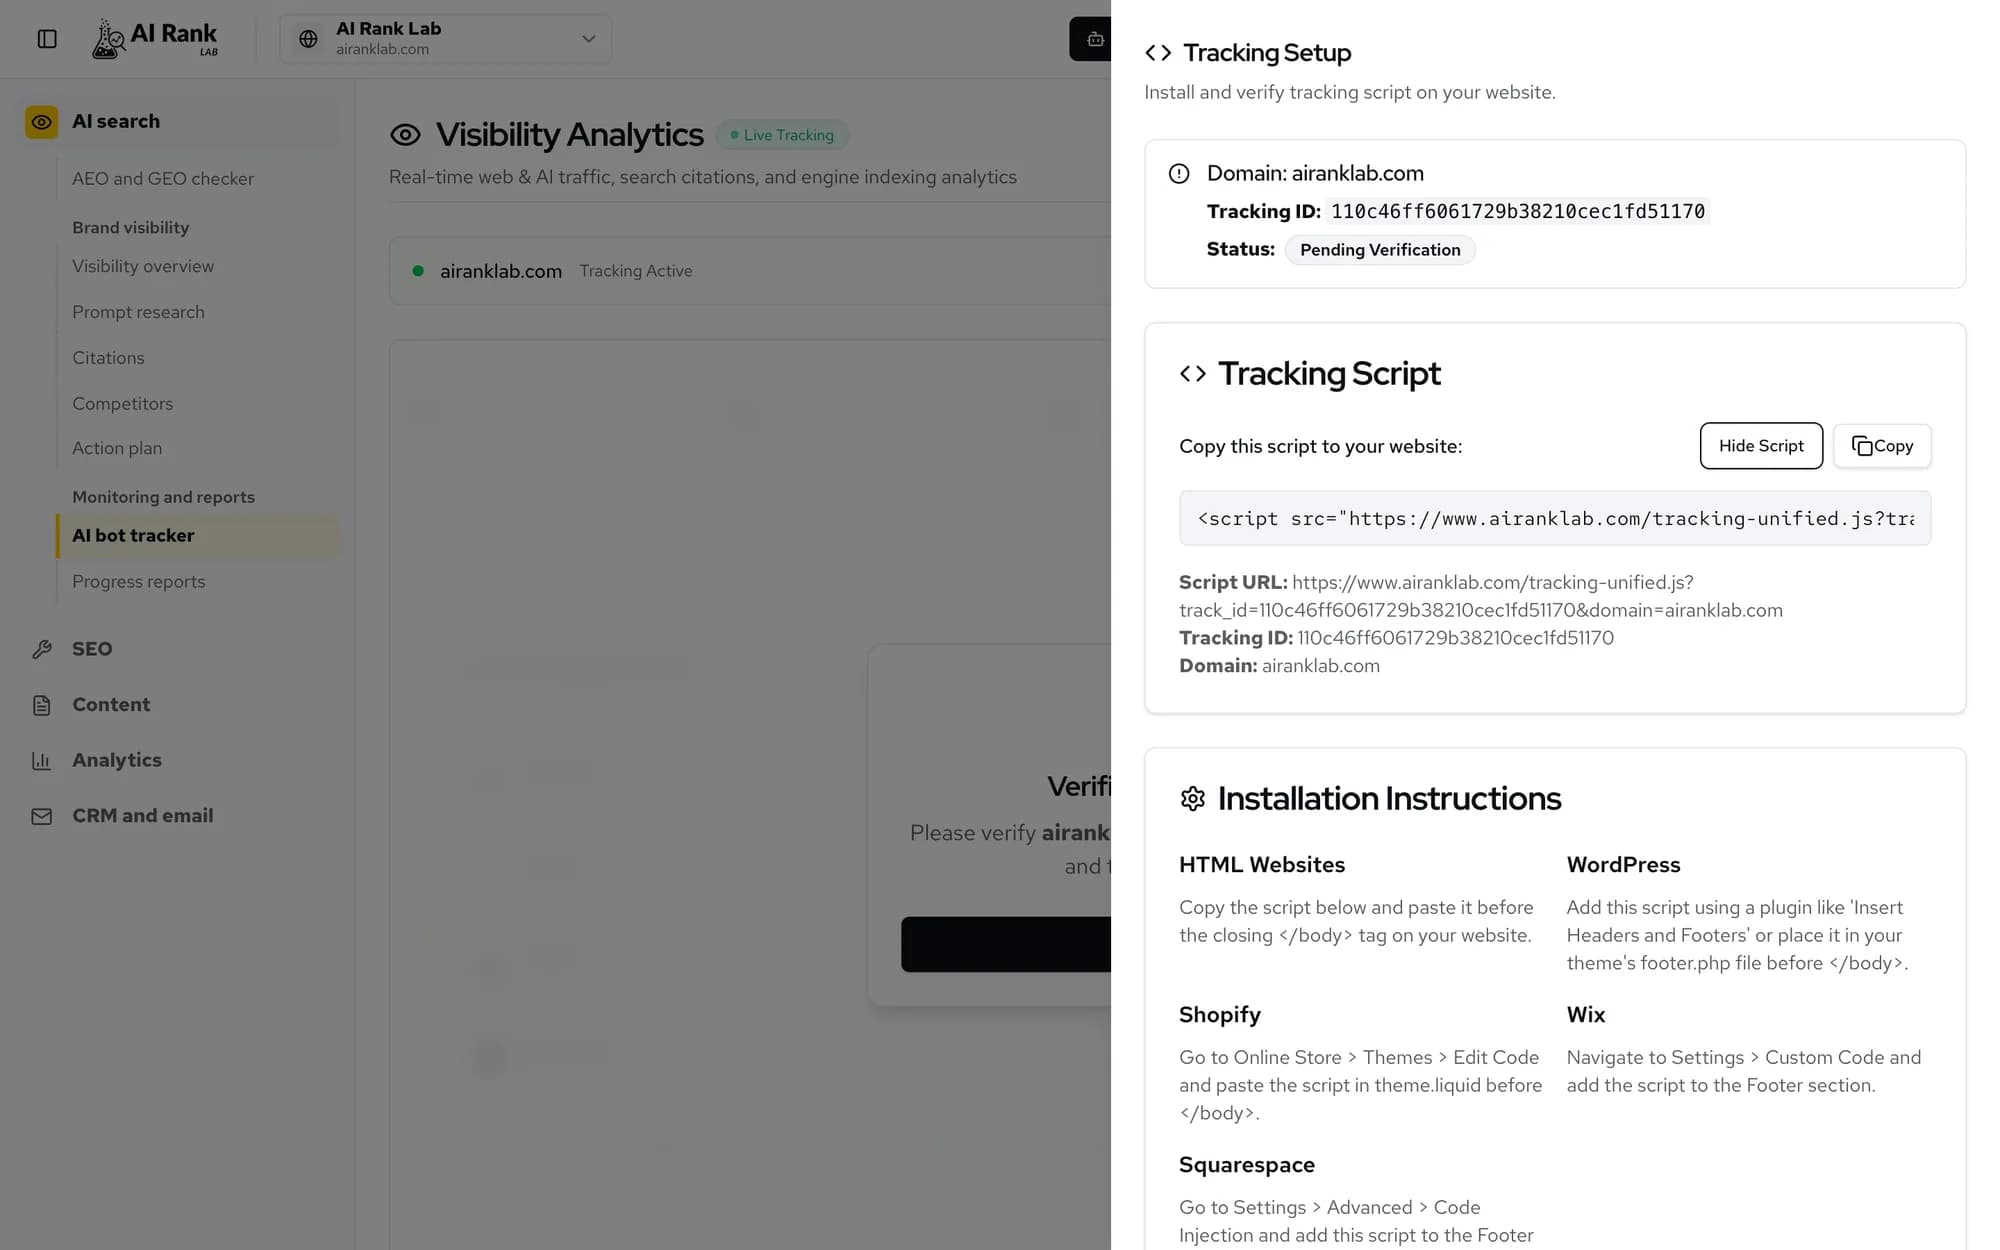
The setup panel opens on its own for an unverified domain. - Copy the scriptThe panel shows your domain, its Tracking ID and the status Pending Verification. In the Tracking Script card, click Copy. The tag is a single
<script>line that loadstracking-unified.jswith your tracking ID and domain.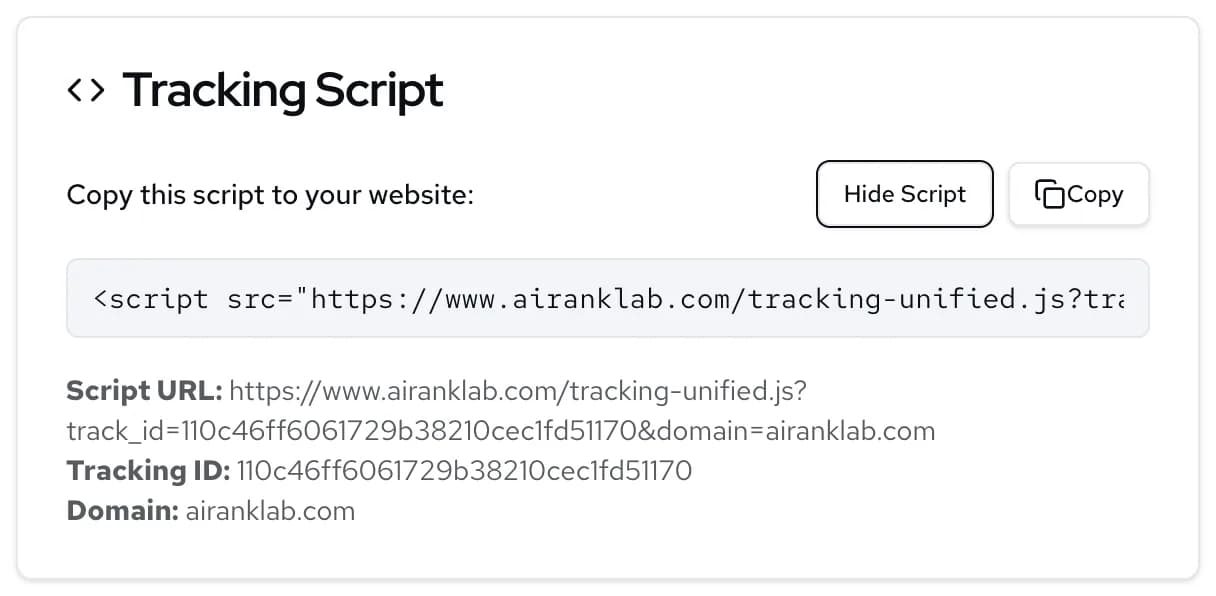
One tag per domain. - Install it on your siteFollow the Installation Instructions card for your platform (see the table below). The rule everywhere is the same: the tag must load on every page, ideally just before the closing
</body>tag. Publish the change. - VerifyBack in the panel, click Verify Installation. When it passes you'll see Script installation verified successfully! (with "(Test visit created)" added if no real visit was found), the status becomes Verified & Active, and the analytics behind the panel unblur. Test Tracking opens your site in a new tab and records a test event.
Where to paste it, by platform
| Platform | Where the tag goes |
|---|---|
| HTML site | Before the closing </body> tag on every page, or in the shared footer template. |
| WordPress | A header-and-footer plugin such as Insert Headers and Footers, or the theme's footer.php before </body>. The AI Rank Lab WordPress plugin can also add it: see The WordPress plugin. |
| Shopify | Online Store → Themes → Edit Code, in theme.liquid before </body>. |
| Wix | Settings → Custom Code, added to the Footer section. |
| Squarespace | Settings → Advanced → Code Injection, in the Footer section. |
How verification really works
Verification passes when AI Rank Lab has recorded a visit for the domain in the last 24 hours, or a test event in the last 2 hours. If no real visit is found, the button sends a test event itself and checks again.
Because the check accepts a test event sent from the dashboard, a domain can show Verified before the tag is actually on your site. If the success message ends with "(Test visit created)", no real visit was found. To be sure, open one of your pages, view its source and search for tracking-unified.js. Then come back over the next day and check that visits appear in the AI bot tracker. If they don't, the tag is missing or blocked, for example by a caching plugin serving an old page.
What it costs
Installing and verifying are free. Tracked requests are billed in small blocks from your normal credit balance. When the balance reaches zero, tracking pauses and the panel shows Tracking Paused. It restarts on its own after you top up. The Recharge Coins button there opens the same credit page as everywhere else; "coins" is an older name for credits.
Install the tag from the account that owns the site. On a shared domain, a Viewer can only read the tracker; Employee and Client members can also click Verify Installation, which updates the owner's domain. See Share a domain.
Check yourself
0 of 3 answered.
Progress is saved in this browser.
Transcript
Put the lesson to work
Paste your site and get a free SEO, AEO and GEO audit with the fixes, then come back to the next lesson.